March 19, 2024

Ball Balance for a Strong Core

Fit Body:

Ball Balance for a Strong Core

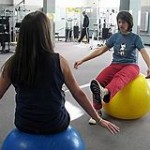
Sit on a stability ball with both feet together. (Be sure your ball is the proper size. When sitting your hips should be level with or 1-2 inches above your knees.) Once this skill is mastered safely, add a balance challenge to strengthen your core. To perform the exercise, lift your right foot up off the floor. If you’re stable, extend your right knee. Keep your torso upright and straight, and pull your belly button into your spine. Hold for 10 seconds, and then return your right foot to the floor. Next, lift your left foot up off the floor, extend your left knee. Hold for 10 seconds.


*Consult your physician before performing exercise.

Take Your Planks Up a Level

Get Fit Quick Tip:

Planks… Plus!

Take your planks up a level by adding in 2 additional moves:

Begin in a plank, on your toes and hands. Keep your body straight. Next, lift up your right leg, bend your knee and pull your knee up toward your chest. Straighten your knee to complete 1 rep. Do 10 reps, then release. Repeat with your left knee. Do 10 reps.

Begin in a plank, on your toes and hands. Lift your right leg up off the floor about 6 inches. Keeping your knee straight, slide your leg out to the side about 10-12 inches, then return to the center to complete 1 rep. Do 10 times, then release. Repeat with your left leg. Do 10 reps.


*Consult your physician before performing exercise.


Incorporate a Stability Ball

Get Fit Quick Tip:

Incorporate a Stability Ball into your Workout!

Exercising on a stability ball adds a challenge to your core muscles. Here are your safety considerations:

To find the correct size: Sit on the ball. Your thighs should be parallel to the floor, or your hips should be an inch or two above your knees.

Don’t leave the ball in the sun, or use on a sharp uneven surface.

Use the ball on a non-skid floor.

Do the exercise first without weight or load to determine your ability to get into and out of the position safely.

The ball should be held stable and not be used to bounce while lifting weights.


Ab Tuck and Crunch

Get Fit Quick Tip:

Ab Tuck and Crunch

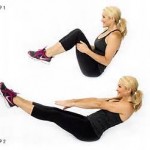
If you’re looking to challenge your abs, try this move. Begin lying flat on the floor, next lift up your upper body with your arms in front of you for balance. Then, lift both legs up off the floor to your starting pike position. Next, exhale and pull both knees into your chest while stabilizing your torso in the incline position. Inhale and return to your staring pike position. Repeat 10 times.


*Consult your physician before performing exercise. This exercise is for those without injury concerns.

Progress your Ab Plank

Get Fit Quick Tip:

Side Plank

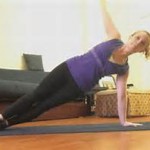
Lie on your right side on the floor. Place your right hand on the floor directly below your shoulder. Place the outside of your right foot on the floor, with both legs straight. Lift your body up off the floor and hold your body straight in a side plank position. Release by dropping your hips to the floor. Repeat with your left hand and left foot on the floor. Lift your body up and hold the side plank position. Begin with a ten second hold on each side. Breathe through each plank, hold your belly button in tight and maintain proper spinal alignment.


*Consult your physician before performing exercise.

Planks Explained by Gen Levrant

Make your planks functional: 5 variations to try

I could go on for pages about why and how a standard plank will not give you a flat stomach. Holding your abdominal muscles isometrically for as long as you can is not functional. Fortunately, there are ways to tweak the plank to make it functional. For a muscle to produce a powerful contraction, it first needs to lengthen. This does not happen in the plank, so here are five variations to ensure it does. (Please consult with a fitness professional if you are pregnant, new to exercise or unsure of proper and safe technique. And as always, seek medical clearance from you doctor prior to beginning any exercises.)

Knee to chest: start in a standard plank position: elbows bent, forearms resting on the floor and abdominal muscles braced. Use your abs to pull one knee towards your chest, bending it at a right angle and exhaling. Repeat with other knee for 10-20 reps.

Tilting hips: start in a press up position. Keeping your feet together, tilt your right hip to the side as if trying to point it to the ceiling. The same side elbow will bend a little. Go back to the start and repeat with the other hip for a total of 10-20 reps

Reverse plank: start on all fours facing the ceiling with your elbows straight, knees bent and bottom off floor. Reach to  the ceiling with one hand, raising your pelvis to the ceiling and engaging your gluts. Dip your elbow and repeat for 10-15 reps before switching arms.

Up & under: start in a press up position, open one arm up as far as it goes. Bring it down under the body, reaching as far as you can before replacing it back at the start. Repeat with the other arm for 20 reps (10 each arm.)

Foot crossovers: start in standard plank. Cross one foot over the other to touch the floor outside of it, and bring back to the start. Repeat for 30 secs before switching legs.

Take a look at all moves demonstrated on YouTube.

These will hit your abdominals in three planes of motion, which is how we are designed to move. They can be added on to one of your existing workout routines or performed alone.

Gen Levrant is an Advanced Personal Trainer and fat-loss specialist operating out of a private functional training studio in Southampton UK. For fitness tips, updates and further info: http://www.fasterpt.com/personal-trainer-southampton/or email Gen via gen@fasterpt.com. Follow her on Twitter @PTGen, https://www.facebook.com/FasterPersonalTrainingSouthampton or via YouTube Channel http://www.youtube.com/watch?v=82Jii13lkNY

Ask A Pro by Tera Busker

Question: What is a “Bosu Ball?” What’s the benefit of a Bosu Ball and how can I utilize it in my gym workout?  -Chad in Boise, ID.

Answer: The BOSU ball, which stands for” Both Sides Up”, is an extremely effective fitness tool that can be utilized for a wide range of training purposes. It’s essential to seek guidance from a Fitness Professional to learn how to use this fitness tool safely. When used correctly, the BOSU ball can be used to increase flexibility, enhance balance, boost speed and take your strength to the next level. Because you can use both sides of the BOSU (rounded side facing up or rounded side facing the floor), your exercise and fitness options are endless.

When incorporating the BOSU into your routine, take things slowly and perform all exercises with purpose and good form. Because the BOSU really challenges your balance, your muscles, especially the core, will be working overtime. Start off with incorporating the BOSU into standard exercises like squats, pushups and planks. Stand on the rounded side of the BOSU when you do squats and place the BOSU flat side up and hold onto the sides while doing pushups and planks. If you are a beginner to incorporating stability challenges into your workout or you have balance issues, try standing on the BOSU (always round side up) while performing exercises like shoulder presses, bicep curls and side raises. As always, obtain medical clearance before beginning an exercise program.

Tera Busker is an ACE Certified Personal Trainer and owner of Fitness To Go, an exclusive In Home & Private Studio Personal Training Service based out of Roberts, WI. www.fitnesstogo.net